Thursday, April 30, 2020

Leaf Bugs

                                           Leaf Bugs


Today we took a walk outside and collected leaves, flowers, and other plant life. I told the kids to pick a variety of different plants with different colors and sizes. We had been studying insects during the day and had discussed the parts of the insect and how they have six legs, a thorax, an abdomen, antenna and wings. 
Then I told my girls to create their own insects out of the plants they found- We talked about how to create wings, legs, antennae etc. They assembled their insect first to make sure they knew exactly what they wanted them to look like. We used tacky glue and they glued their insect on the paper. 


            We loved how they turned out and was I was impressed with their use of color. 

Wednesday, April 29, 2020

Organism Drawing from life!

This is a project that I taught my students (middle schoolers) and my girls. Due to the fact that schools are closed for the Coronavirus, I have been teaching my students through an online platform while also designing fun learning activities for my children. It can be a lot to tackle and I feel like I am finally getting the hang of it, although I learn something new everyday!

For this project, I asked my students/kids to collect organisms from around their yard or neighborhood. We talked about choosing live plants, bugs, or even little critters like lizards. We discussed why we chose these particular organisms and what aesthetic qualities they possessed. We talked about colors, textures, forms, or lines that were prominent in the organisms that they chose.


We also looked at artwork by the artist Ernst Haeckel who studied organisms and illustrated them.
https://archive.org/details/KunstformenDerNaturErnstHaeckel/page/n1/mode/2up


The goal was to draw the organisms from life paying close attention. to shape, color, value, and texture.


Here are some examples of student work. 


Wednesday, March 25, 2020

Earth Art


Today I decided to find an opportunity to get outside and also do something creative with my daughters! 

First, I showed them some Earthworks by Andy Goldsworthy, an artist who uses nature as his canvas. We discussed the colors he uses, what materials, and how he puts them together. 


After viewing artwork by the famous artist Andy Goldsworthy, we decided to take a nature walk. While walking, we talked about different plants that we saw and which ones were their favorites.       


After we had collected various berries, leaves, flowers, and stems, we decided to create an interesting design. My daughter started to create a radial design and we discussed balance and how radial design is found throughout nature.                                                                      
 

Tuesday, September 25, 2018

Science and Art Collide Again


What happens when oil and water mix? What happens when you add color and paper? 


  Marble Painting 


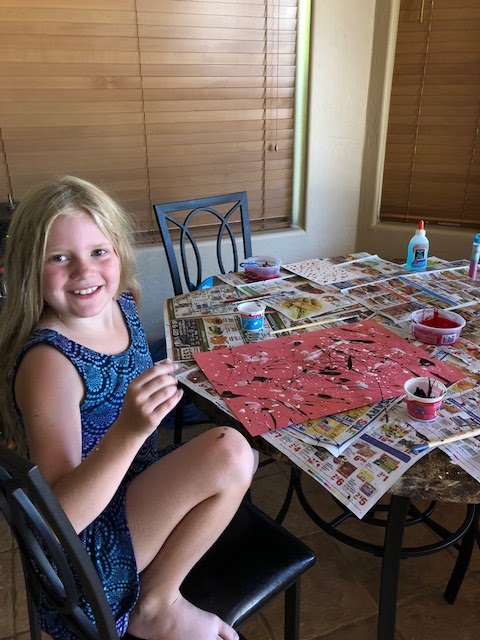
      My eight year old loves to do science experiments and loves art. In fact, I haven't met a child who does not like to experiment. We decided to combine a scientific inquiry with an artistic medium. My daughter knew that oil and water do not mix but she was eager to discover what would happen if we added color. 

Materials: Heavy paper (we used watercolor paper), food coloring or liquid watercolors, vegetable oil, a large plate and 5 or more small cups, syringe or spoon.

Step 1: First we gathered all of our supplies and then put an inch of water in our deep plate. 

Step 2: Then we gathered five cups and poured a tablespoon or more of oil into each one. 

Step 3: Then we dropped food coloring into each cup (about 3-5 drops) and stirred it up so that there will lots of little droplets of color. 

Step 4: We then took a syringe and filled it full of oil/food coloring from one cup at a time and squirted it into the large plate with water. We could try a few different colors and experimented with mixing the oil in more or less depending on how many dots we wanted. 

Step 5: We lay a small piece of the paper onto the water and let it float, absorbing the water and oil. 

Step 6: We lay the paper on a paper towel to dry and watched as the colors appeared. We repeated the process sometimes dumping the water out and getting clean water to experiment with different colors. 


This was a fun process and allowed my daughters and I to question and experiment together, something we all enjoy. We loved watching the colors appear and naming our creations. This  pink one is called bubblegum. 


Process Art Continued.......

   Colorful Ice Sculptures


  This month my girls have been intrigued by mixing color, and being involved in the process of making something. They are also drawn to the scientific process of creation and how elements work to make something. In this case, we used ice and experimented with shape, color and form (art elements), and solids verse liquids through freezing colorful water and allowing it to melt in the Arizona heat. Anytime, I can allow for exploration, my children are thrilled to partake. I am also thrilled to try new things and doing it together brings us closer to understanding the world around us in new and meaningful ways.

How to make an ice sculpture:

Materials: Water, food coloring, ice trays, cups

Step 1. Gather glass cups, food coloring and ice trays.

Step 2. Pour water into 5-7 glass cups or jars depending upon how many colors you want to make.

Step 3: Add food coloring to each cup (5-8 drops per cup).

Step 4: Pour colored water into the ice trays or muffin trays.

Step 5: Freeze for approximately 3 hours or more.

Step 6: Take the ice out of the ice trays and begin to assemble, build and create a sculpture.


Later we brought them outside to take pictures of them and watch them melt. We were intrigued by the colorful oozing water. I loved how the colors mixed as they melted and the shape of the sculpture altered as well. This brought up the idea that art can be ephemeral (lasting only a short while). My eight year old called me a crazy artist, but that is fine with me. 😁


 More Process Art.......

Hot Rock Painting 

Materials: Rocks, crayons, aluminum foil

   Step 1. Collect smooth rocks of different sizes. We went on a nature walk and found some very neat rocks in a creek.

  Step 2. We washed the rocks off and placed them on a cookie sheet with aluminum foil in the oven. The temperature was set at 350 degrees. We left them in for about 10-15 minutes.

Step 3. I took one rock out for each child at a time and placed them on a towel covered with brown paper. Then we discussed some different patterns and designs.

Step 4. The girls began drawing with the crayons and they began to melt and as they drew with them giving a painterly appearance. The colors were vibrant and beautiful!


Thursday, September 6, 2018

Making Connections

                               Making Connections


  Today, I decided to provide an opportunity for my girls to make connections between science and art. They are very interested in the human body and how it works so we decided to start with blood. I have been reading the book " Arty Facts, Our Bodies & Art Activities." Making connections with art and the world around us is something I always strive to do. In this case, we talked about what blood is, how it travels and how we have red blood cells and white blood cells. Then we talked about creating an artwork about blood. We talked briefly about paint, and how you can get different effects by applying paint in unique ways. We gathered our supplies, and set up our table.


                             Supplies

Newspaper
Paint brushes
Old tooth brushes
White Card stock Paper
Red Cardstock or Construction Paper
Red Paint
White Paint
(Glitter if you desire it)

                                                        Inspiration


   Before we started painting, we looked at an artwork by Jackson Pollock. I asked the girls what they thought of his art. They thought it was really neat but wanted to know why he was so famous for just splattering paint. I told them about his method and how he called it action painting. I told them that he was one of the first artists to paint a completely abstract painting. I told them that it was all about the process and the action of painting, splattering, drizzling etc.


The Process


 We started with red paint on white paper. We experimented with drizzling, splattering and dripping the paint. They each experimented in different ways. Then we moved onto white paint on red paper and the different effect that it has. We talked about white blood cells as they began to experiment. They each enjoyed the process throughly and loved being able to just watch the paint as it drizzled and splattered across their paper. The results were amazing and we mounted them side by side on black paper.


          Finally, my older daughter decided that she wanted to continue this process but on a larger piece of paper. This time she had black, red and white paint! She loved the process and even enjoyed seeing the different lines and shapes that she had created at the end.